The CMS Made Simple (CMSMS) News module is perfect for creating and displaying news and event articles on your website. Articles are created in the News module editor, similar to the content editor, and displayed in a template or page.
Adding news articles
Log in to your CMSMS admin panel and go to Content > News. Click Add Article.

On the Add Article page, complete the Title, Category, Content, and Status fields. You can also add an optional Summary, Post Date, and Expiration Date. Click Preview to see how the article will look when it’s published. When you’re finished writing the article, click Submit.
Displaying news articles
News articles are displayed by adding the {news} tag to a template. For example, our default template includes the following code specifying how news articles are displayed in the sidebar:
{* Start News, style sheet "Module News" *}
 <div id="news">
 <h2>News</h2>
 {News number='3' detailpage='news'}
 </div>
{* End News *}
This code specifies that three news article summaries are displayed (number=’3′) in the sidebar, and that full news articles are displayed using the news page template. A complete list of news tag parameters is available in the News module help.

News module settings
The News module can be configured and customized in several ways. To change the settings, log in to the CMSMS admin panel and go to Site Admin > Settings – News module.
Categories
News articles are organized by assigning categories. Each article can be assigned only one category. Categories can have child categories, and you can create as many as you need.
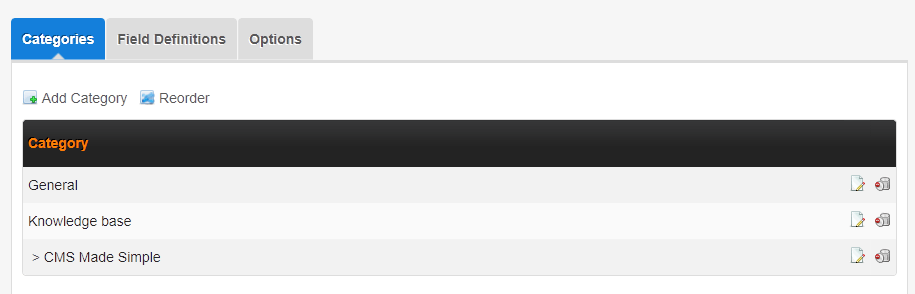
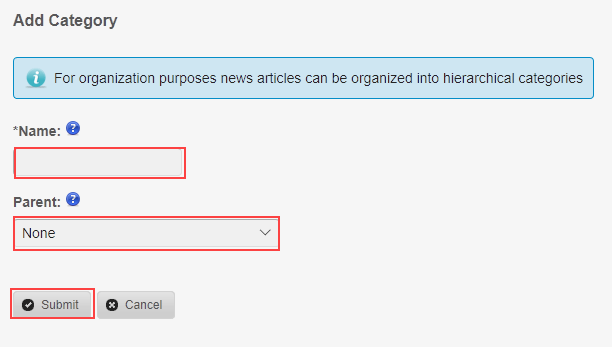
To add a category, click Add Category on the Categories tab. Enter a Name for the category. If you want this to be a child category, select a parent category from the dropdown list. Click Submit.
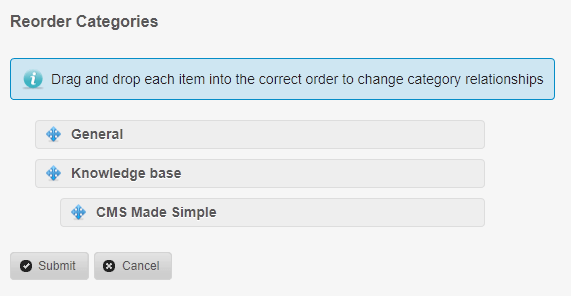
You can reorder categories and child categories. Click Reorder and drag and drop the categories in the order you want.
Field definitions
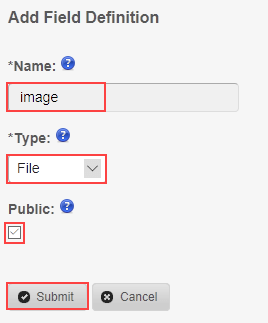
Field definitions are custom fields that allow you to add files, images, or text fields to your news articles. Field definitions are displayed on the Add Article page in the News module. In this example, we’re adding a field definition that adds an image to news articles.
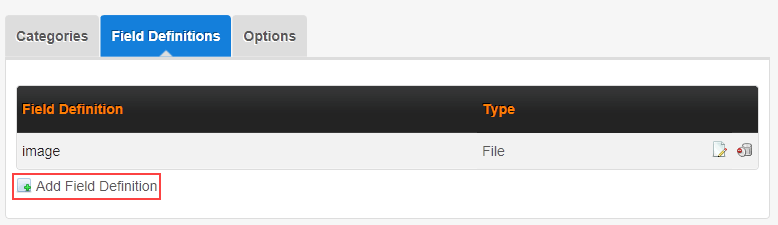
To add a field definition, click Add Field Definition on the Field Definitions tab. Enter a Name for the field and the field Type. If the field should be viewable on the website, select Public. Click Submit.
Now we’ll open our default News::Detail template in Design Manager > Templates and add the following line of code at the top of the template.
{if isset($entry.fieldsbyname.image)}{/if}
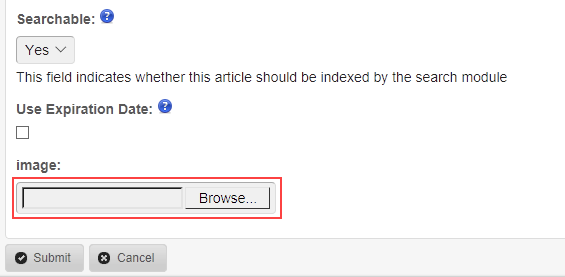
Save and close the template. To add an image to a news article, go to Content > News and click Add Article. The image field is now displayed at the bottom of the Add Article page. Browse to the image on your local computer to add it to the article.
Options
Several News module options allow you to customize how the news articles are created and displayed on your site.
News Submission Settings
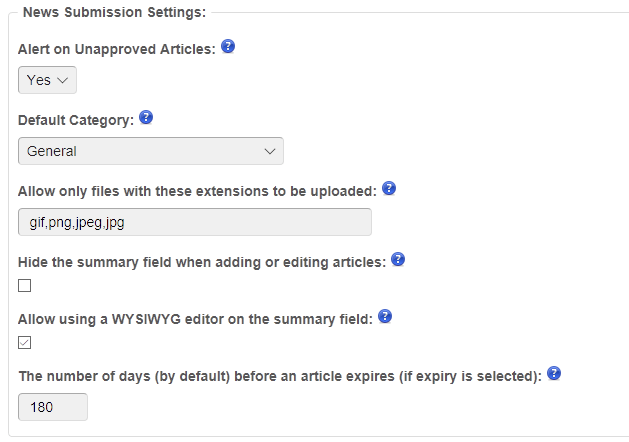
- Alert on Unapproved Articles – Select this option to receive email alerts when news articles are ready to be reviewed and published.
- Default Category – Specify the default category that will be assigned to news articles.
- Allow only files with these extensions to be uploaded – Specify the file formats that can be uploaded in field definitions using the File field type.
- Hide the summary field when adding or editing articles – Select this option to hide the summary field when adding or editing news articles.
- Allow using a WYSIWYG editor on the summary field – Select this option to use a WYSIWYG editor on the summary field when adding or editing news articles. If this option is not selected, the summary field is a plain text field.
- The number of days (by default) before an article expires (if expiry is selected) – This is the default number of days before a news article expires. The minimum is one.
Frontend Submit Settings
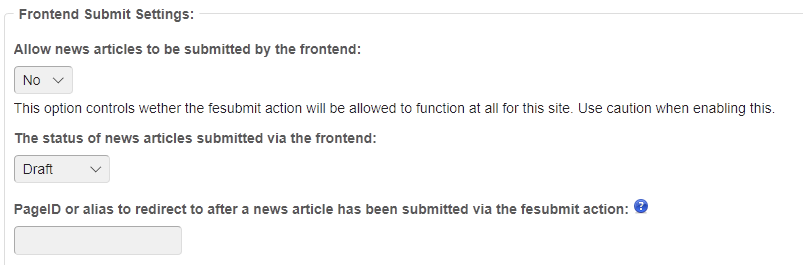
- Allow news articles to be submitted by the frontend – Specify whether users can submit news articles on the front-end.
- The status of news articles submitted via the frontend – If news articles can be submitted on the front-end, choose Draft or Published as the default status.
- PageID or alias to redirect to after a news articles has been submitted via the fesubmit action – Specify a page that will be displayed after a news article is successfully submitted on the front-end.
Notification Settings
These settings are required only if front-end news submissions are allowed.
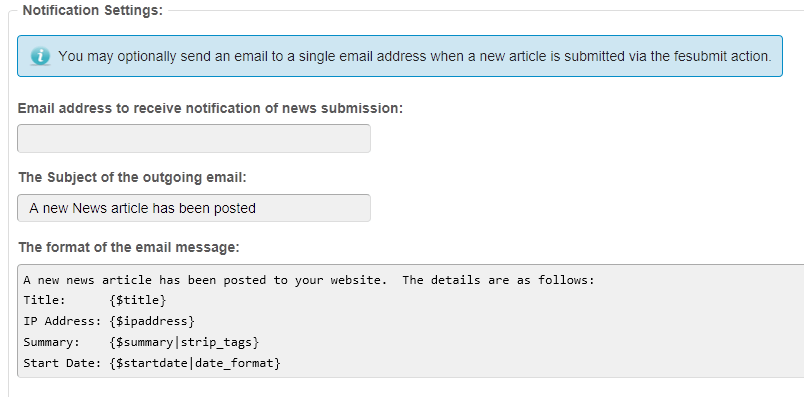
- Email address to receive notification of news submission – Enter the email address that will receive a notification when a news article is submitted on the front-end.
- The Subject of the outgoing email – Enter the subject of the email notification.
- The format of the email message – The body of the email notification.
Detail View Settings
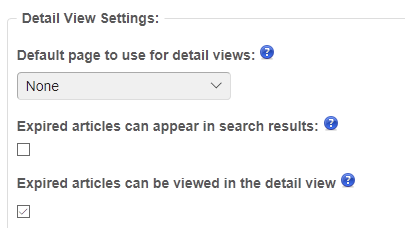
- Default page to use for detail views – Select the page (and template) for news detail views. If the selected page has child pages, you must also select a default child page. Custom news detail URLs will not work if this parameter is not set to a valid page.
- Expired articles can appear in search results – Select this option to include expired news articles in search results.
- Expired articles can be viewed in the detail view – Select this option to allow expired news articles to be displayed in the news detail view.
More information
For detailed information about the News module, click Module Help in the News module.
If you need help with your HostPapa account, please open a support ticket from your dashboard.
