Introduction
To view the tax settings, click on Settings > Taxes inside the admin panel area. You can use this area to modify the tax settings for your shop.
Note: be very careful when modifying tax information. If you collect incorrect tax amount, it can become a legal issue.
Here are the options available to you
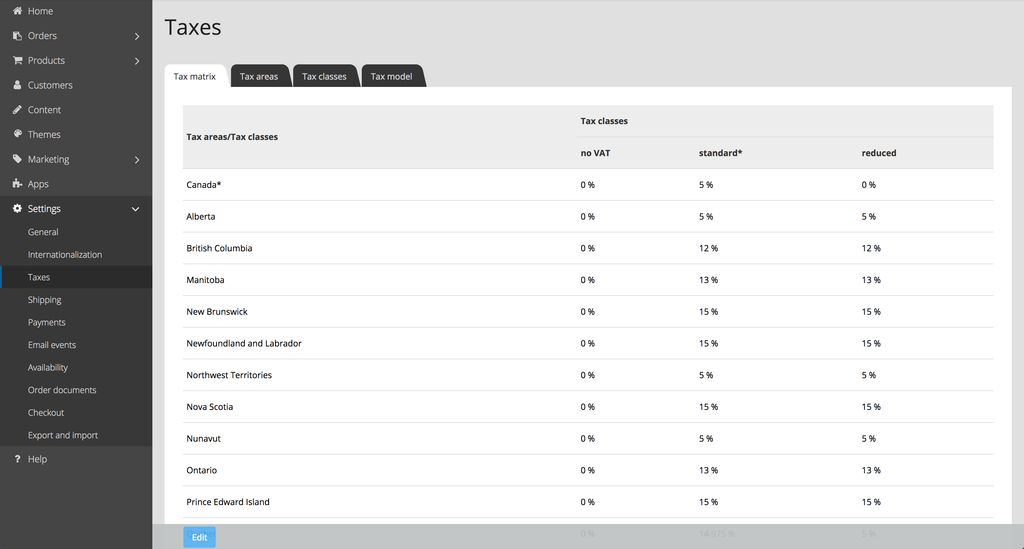
Tax Matrix
You can see the widely used tax classes in the main tax area here. Click on Edit and, after reading the warning message, you can edit these percentages. Note that during editing, your shop will be offline. This also allows editing of settings under the Tax Areas and Tax Classes tabs.
Tax Areas
This section deals with the different tax areas that are available. You can select Assignment of Countries to find out which countries are assigned to the tax area. It is recommended that you don’t edit tax areas information.
Tax Classes
This area displays the various tax classes available in the system. It is also highly recommended not to modify tax classes.
Tax Model
You can change various tax settings related to the Tax Model here. Here is what you can adjust:
* You can specify if prices in the admin panel are displayed as net (without tax) or gross (with tax). It is required in North America to show net prices only.
* You can specify if the price displayed in the shop should show price without tax (net), or price and tax together as a single amount (gross) or just the price because there is no sales tax (exempt). It is required in North America to show net prices only.
Before making these changes, you should check whether the tax laws in your country allow the settings you want to use.
